Swing Test
Swing Test Drawn
Tuesday, 24 May 2011

Man Modelling (Problem Solving)
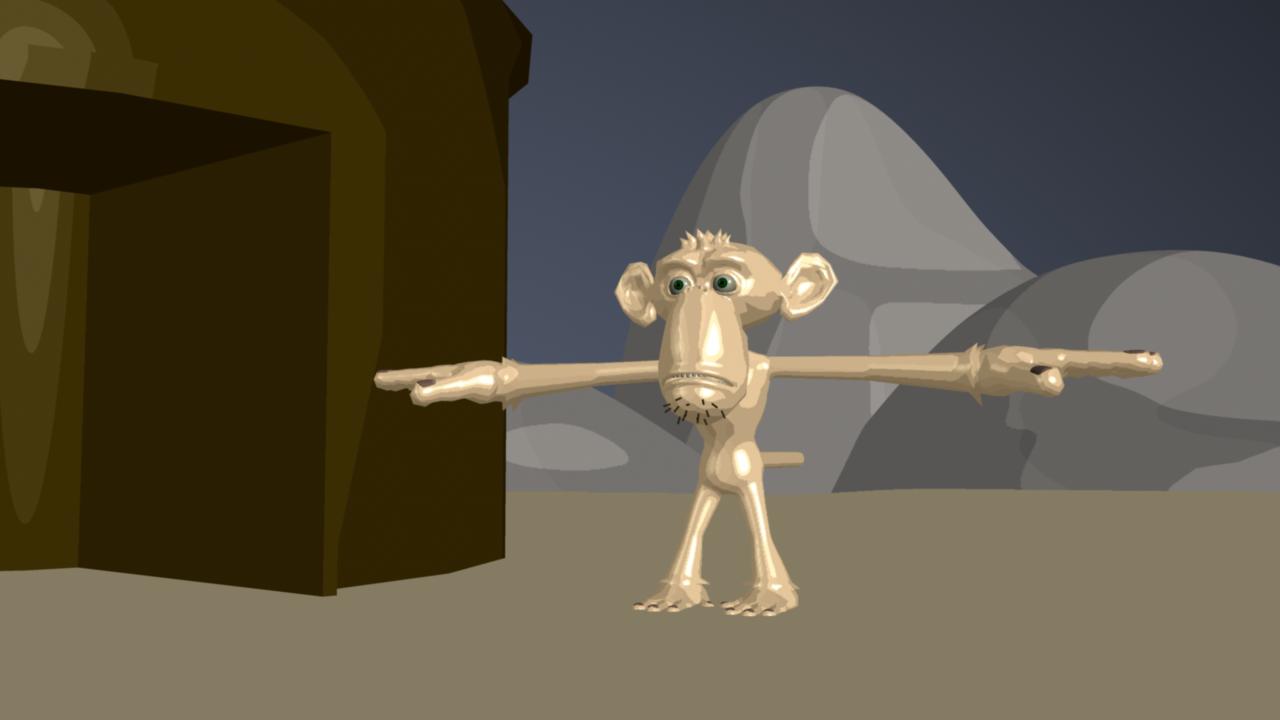
Originally the Character of the mongol was going to be modeled by another student on the course not a member of my team but the modelling of he character was so hi-res that our rigger was having issue when it came to the rigging it. The character was also modeled with no legs under the coat that created a lot of issues once the rigging began. it was at this point that i said to the rigger did she want me to create a character model over the weekend to see if the rigging would be easier. After showing the model to the rigger she decided it would be easier to use my model but I had to get the director to okay it first. The director loved the model it was beginning to look more like the original concept.


 Here you can see the characters development stages, this is an images just showing the beginning stages of the body before the head was added and the director gave me his input on the model. I know that at this stage there was a lot to be adjusted such as proportions of the body and making him more stylised.
 At this point I had been given a fair amount of input


Wednesday, 20 April 2011
Rendering 3
After my talk with the director I could see that this style wasn't working and the director said that he want to go in more a scroll style direction and maybe try and have the characters look more drawn. Initially I tried using the outline shader that is built in to Maya but I was having a lot of issues getting it to work. While I was trying to get it to work I didn't realise that I still had the cell shader active and I accidentally rendered from under the light and saw the my model had and outline of one colour.

Monday, 11 April 2011
Rendering 2
One of the issues I had at the start of this project I had a few issues as there was no specific style to work on, all I had was 'we want it to look mongolian' and what was in the directors head. Also not really having a concept artist on board at first, I was struggling at first as it is not normally the job of the renders to find the style of the film but to mimic what the concept looks like. We had plenty of artists in our group just who weren't fitted to what the director wanted.
After sitting down with the group and having a discussion with the director we managed to decided on a cell shaded style mixed with a scroll look. Unfortunately at this point I still didn't have any concepts to work from, so the first thing I did was to go to CreativeCrash.com and raid their huge bank of user created content to find a cell shader. I eventually managed to find a cell shader that allowed me to start experimenting.
I spent a week or two playing with the settings to try and see what kind of style I could find. Once I had a basic idea of the controls for the shader i started creating a series of basic images just o show the director what it could possible look like. for these render is decided to focus on the face of a character rig i had a it showed variation in shadow because of all the curves on its face.
For the shader there were 3 main settings to be played with first of it was possible to changes the size each section (Shadow, Normal and Highlight), the amount of sections and finally give a hue to any section for coloured light.
Below are a selection these renders which were the starting point that i showed to the director


Here you can see a mock up I did for the environment to test the renders with some simple mountains just to get a feel for how it could look as a whole.

After showing this render to the director it was decided this wasn't really the direction the film should have been going in so I was going to have to bring experiment with some different styles.
Monday, 31 January 2011
Eagle Modelling
Test
Here is a test for the eagle model which I did just so I could look at the model and think about the flow of the edges and which way would be easiest to model. One of the things I realised was that the hardest part of the eagle to model was going to be the face at which point my group reminded me that its only in the animation for less the five seconds and one of the thing about animation is that there is no point making something that isn't going to be seen.

The Body and Face
The way that I set up the model was by creating a box deleting one side of it and using the other as the master, I would then create an instance of this so that I get a symmetrical model throughout the whole modelling process. Below is a image of the eagle in the early stages where you can see was just blocking it out, I started with a simple box and started extruding each section one at a time getting each looking good before moving on to the next section .

Here you can see a smoothed version of the eagle model above which gave me more of an idea as to how the finished model was going to look.

The beak was hardest bit I had to model I had trouble getting the hooked look at first but after playing with the vertices's for quite a while I started to get the look you can see below.

Wings and Changes
Here you can see the eagle is nearly finished, it was at this point I went to get some feedback from the director as I was at a good point to make any changes that were needed. I was told that although the eagle matched the concept art it needed to have a more angular and streamlined look compared the stylised look which he found wasn't working. Firstly I started by widening the neck out so that eagle was more of a point shape, I also shrunk the head a bit and reduced he hook on the beak all to add to the streamlined look. For the wings I looked at eagle reference and tried to mix it with the stylised wings of the original model, I then gave this to the director at which point I was given the go ahead to continue with the model. Below you can see the results of my changes I made at this stage
Old Version
 New Version

Feet
The feet were quite difficult to model as getting the claw shape looking right was hard but its was very similar to the beak I just had to spend a while playing with the vertices's.
 Finished Model
Once I had the model looking how I wanted I created 2 version one Hi-Res and one Low-Res. Creating these was fairly simple I started by deleting the the instance and creating a copy of the master side of the model and inverting it on the X Axis so that a had a model that looked complete. The next thing I had to do was combine the 2 halves and then select any of the vertices's that were touching another vertices from the other half and merge them so that I had a complete model.


Here is a test for the eagle model which I did just so I could look at the model and think about the flow of the edges and which way would be easiest to model. One of the things I realised was that the hardest part of the eagle to model was going to be the face at which point my group reminded me that its only in the animation for less the five seconds and one of the thing about animation is that there is no point making something that isn't going to be seen.

The Body and Face
The way that I set up the model was by creating a box deleting one side of it and using the other as the master, I would then create an instance of this so that I get a symmetrical model throughout the whole modelling process. Below is a image of the eagle in the early stages where you can see was just blocking it out, I started with a simple box and started extruding each section one at a time getting each looking good before moving on to the next section .

Here you can see a smoothed version of the eagle model above which gave me more of an idea as to how the finished model was going to look.

The beak was hardest bit I had to model I had trouble getting the hooked look at first but after playing with the vertices's for quite a while I started to get the look you can see below.

Wings and Changes
Here you can see the eagle is nearly finished, it was at this point I went to get some feedback from the director as I was at a good point to make any changes that were needed. I was told that although the eagle matched the concept art it needed to have a more angular and streamlined look compared the stylised look which he found wasn't working. Firstly I started by widening the neck out so that eagle was more of a point shape, I also shrunk the head a bit and reduced he hook on the beak all to add to the streamlined look. For the wings I looked at eagle reference and tried to mix it with the stylised wings of the original model, I then gave this to the director at which point I was given the go ahead to continue with the model. Below you can see the results of my changes I made at this stage
Old Version


Feet
The feet were quite difficult to model as getting the claw shape looking right was hard but its was very similar to the beak I just had to spend a while playing with the vertices's.

Once I had the model looking how I wanted I created 2 version one Hi-Res and one Low-Res. Creating these was fairly simple I started by deleting the the instance and creating a copy of the master side of the model and inverting it on the X Axis so that a had a model that looked complete. The next thing I had to do was combine the 2 halves and then select any of the vertices's that were touching another vertices from the other half and merge them so that I had a complete model.
Now that I had the model at this stage I started by softening the edges which created my Low-Res version but I wasn't sure if it would be easier to rig for Tara if she had a higher res model so i also created a Hi-Res version. The way I created the Hi-Res version was by pressing 3 for the smooth mesh preview and the going Modify-Convert-SmoothPreview to Polygons the reason I did it this way is because when I was doing work experience at the Mill and got some training I was told as long as the topology is looking good this gives a quick but efficient Hi-Res model.


Tuesday, 30 November 2010
Compositing Tests
This was a tutorial from 3D world magazine I did to help me understand how the passes all work with each other and how they can effect each other as well as how to make subtle changes easily because the render was planned out properly.


Render 1
Had a talk with my Director yesterday he wants a cell shaded/scroll look for the film, here are my first tests while getting used to the cell shader that I downloaded. I know these are nothing special but its my first day playing with the toon shader toon shader I thought I would play with there is a fair bit of control with the settings so its worth a look at.
http://www.the-area.com/downloads/shaders?word=toon&where=1&software=&material=


Subscribe to:
Posts (Atom)